Recently, I created an automated process for backups using Rclone, which initially worked flawlessly. However, as my data grew, it became clear that taking full daily backups was becoming inefficient and costly. I needed a solution that could perform rclone incremental backups instead of only full backups. After some research, I discovered Restic, and it turned out to be the perfect fit for my needs.
Restic is incredibly user-friendly and integrates seamlessly with my existing backup process. Its ability to work with Rclone remotes was a game-changer, as it allowed me to maintain my current workflow with minimal changes.
Why Restic & incremental backups
Restic handles incremental backups flawlessly. Instead of copying all files every time, it only store changes made since the last backup. This approach is not only lightweight but also cost-effective, making it an ideal choice for long-term storage.
Getting started
Before we dive into the setup, make sure you have the following:
- Restic: Install Restic on your system.
- Rclone: Install Rclone and configure it to connect to your remote storage sources, such as SFTP or Google Cloud Storage.
Configuring rclone is a breeze. Just run the following command and follow the prompts:
sudo rclone configYou can use this command anytime later to add new remotes, or make changes to existing ones.
Step 1: Initialize Restic Repository
Begin by initializing a Restic repository where your backups will be stored. You can choose your preferred storage location/provider; for example, I’ll use `gcs`, this should be the same name you gave to your rclone remote during the configuration. Here’s how you can do it:
sudo RESTIC_PASSWORD="your_password" restic -r "rclone:gcs:alikh/test.com/incremental/" initI’ll break this command down so you can understand what’s going on:
- `
sudo`: We use this to execute the command with root privileges, ensuring access to the folder you intend to back up. If you employedsudofor `rclone config`, remember to continue using it for subsequent commands to avoid encountering different errors. - `
RESTIC_PASSWORD="your_password"`: This part is optional unless you’re integrating your command into an automation script. If `RESTIC_PASSWORD` is not defined in the global scope using `export`, Restic will prompt you for a repository password on every operation. Just make sure to replace “your_password” with your actual password. - `
-r "rclone:gcs:alikh/test.com/incremental/"`: We use the `-r` flag to specify the repository location, and we feed it an rclone remote for this purpose. The format is `rclone:<remote>:<path>`, where `<remote>:<path>` is directly passed to rclone. Assuming you’ve configured a remote named ‘gcs’, you can use it as shown above, followed by the path, which in our example is “alikh/test.com/incremental/“. This path starts with the bucket name “alikh“. - `
init`: This instructs Restic to create a repository in the remote location we specified after `-r`.
Step 2: Backup creation
Backing up with Restic is quite simple. You can structure the command similarly to the previous one, with just one change: instead of `init` use `backup` followed by the directory path you wish to back up.
Here’s an example:
sudo RESTIC_PASSWORD="your_password" restic -r "rclone:gcs:alikh/test.com/incremental/" backup "/home/test/htdocs/test.com/"
If you want to exclude specific files, simply add the `--exclude` flag followed by the path of the file you want to exclude. You can use multiple `--exclude` flags in the command, but make sure to provide the full path for each exclusion. Failing to do so can lead to backup issues. It’s advisable to begin testing without any additional flags to ensure everything is set up correctly.
Keep in mind that Restic performs incremental backups, only transferring modifications, so no data is lost. Previous backups/snapshots and deleted files are retained until you use the forget and purge commands on the related snapshots (as explained below).
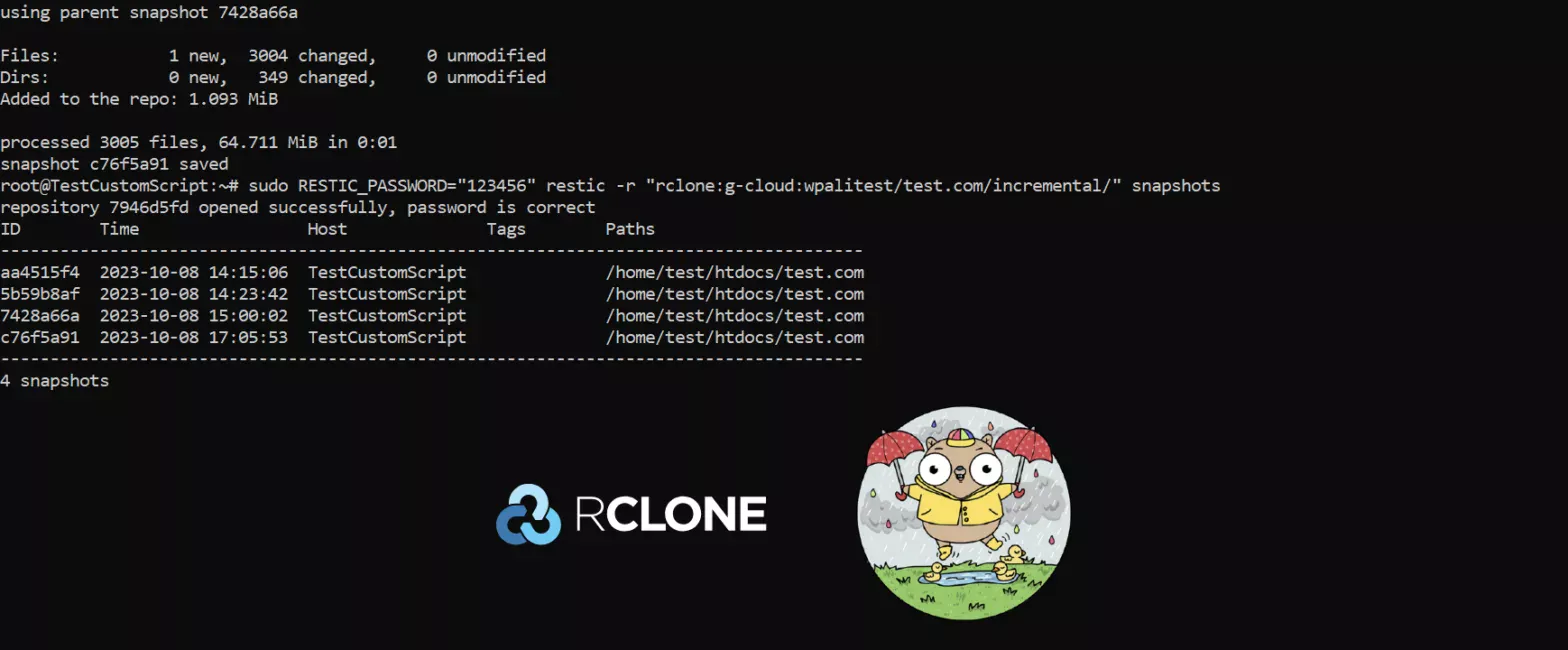
Step 3: List existing backups
To view a list of available backups, referred to as “snapshots” in Restic, we’ll use the same command structure as before but with a new option, `snapshots`:
sudo RESTIC_PASSWORD="your_password" restic -r "rclone:gcs:alikh/test.com/incremental/" snapshotsThis will return a list of existing snapshots:
repository 7946d5fd opened successfully, password is correct
ID        Time                 Host              Tags        Paths
---------------------------------------------------------------------------------------
aa4515f4  2023-10-08 14:15:06  TestCustomScript              /home/test/htdocs/test.com
5b59b8af  2023-10-08 14:23:42  TestCustomScript              /home/test/htdocs/test.com
7428a66a  2023-10-08 15:00:02  TestCustomScript              /home/test/htdocs/test.com
---------------------------------------------------------------------------------------
3 snapshots
You have a wide range of flags at your disposal when using the `snapshots` option. You can access the complete under Restic Docs > Working with repositories.
Keep in mind that each snapshot comes with its own unique identifier (ID) as it appears in the example above. In the following step, we will use these IDs to restore specific snapshots.
Step 4: Restoring backups
While there are multiple methods for restoring a snapshot, we’ll focus on restoration using the snapshot’s ID. It’s a straightforward process; this time, we’ll use the `restore` option followed by the snapshot’s ID. For more extensive information on the different restoration methods, you can refer to the Restic Docs > Restoring from backup.
sudo RESTIC_PASSWORD="your_password" restic -r "rclone:gcs:alikh/test.com/incremental/" restore 7428a66a --target /Note the use of `--target` flag, which is required when you run a restore command. It allows you to specify where the restored snapshot will go. To restore it to the original backup path, use “/” as the target. Make sure to define a different directory if you want to verify the backup content before moving it to the final location.
Step 5: Deleting backups/snapshots
Deleting snapshots can be done in two ways:
- `
forget`: to delete unwanted snapshots. This action doesn’t remove the actual data; it only discards the references to it. - `
prune`: to permanently delete the data that is no longer needed. Think of it like a garbage collector.
You can combine both operations with a single command, let’s assume we want to delete everything except snapshots from the last 3 days:
sudo RESTIC_PASSWORD="your_password" restic -r "rclone:gcs:alikh/test.com/incremental/" forget --keep-within "3d" --pruneYou also have the option to delete a single snapshot by including the snapshot ID after the `forget` option. Restic provides various methods to manage what you wish to remove. To explore all the available options and understand the purpose of each flag, refer to: Restic Docs > Removing backup snapshots.
That’s it, incremental backups doesn’t have to be complicated. Using both, Rclone and Restic, you can efficiently protect your data while maintaining control and flexibility. Feel free to explore my complete implementation of this Rclone and Restic connection for automated incremental backups on GitHub.
Remember, if you’re not automating anything, you can either export `RESTIC_PASSWORD="your_password"` before running commands with, or simply run the commands and allow Restic to prompt you for a password when needed.