While Supabase provides automated daily backups for paid projects, having your own external backups is important, especially if you are on the free plan. This tutorial will guide you through creating manual external backups of your Supabase-hosted PostgreSQL database to your local machine.
Prerequisites Check
Before we begin, let’s verify if you have PostgreSQL client installed. Open your terminal and run:
pg_dump --versionIf you see an error or the version is outdated, you’ll need to install or update the PostgreSQL client. We’ll cover this in Step 1.
While this tutorial uses Ubuntu (both native and WSL) for demonstrations, the steps can be adapted for any operating system that supports PostgreSQL client. Just make sure to adjust the installation commands according to your system.
- Access to your Supabase project dashboard
- Your Supabase database password
- Sufficient disk space for your database backup
Step 1: Installing/Updating PostgreSQL Client
To ensure compatibility with Supabase’s PostgreSQL version, we’ll install the latest PostgreSQL client using the official repository:
# Import the repository signing key:
sudo apt install curl ca-certificates
sudo install -d /usr/share/postgresql-common/pgdg
sudo curl -o /usr/share/postgresql-common/pgdg/apt.postgresql.org.asc --fail https://www.postgresql.org/media/keys/ACCC4CF8.asc

# Create the repository configuration file:
sudo sh -c 'echo "deb [signed-by=/usr/share/postgresql-common/pgdg/apt.postgresql.org.asc] https://apt.postgresql.org/pub/repos/apt $(lsb_release -cs)-pgdg main" > /etc/apt/sources.list.d/pgdg.list'

# Update the package lists:
sudo apt update

# Install the latest PostgreSQL client
sudo apt install -y postgresql-client-16
Note: The commands above are based on the official PostgreSQL installation guide. If you run into any issues or if these steps become outdated, check out the official PostgreSQL documentation for the most up-to-date instructions.
Once installed, verify everything is working by running:
pg_dump --versionStep 2: Obtaining the Database Connection String
To connect to your Supabase database, you’ll need the correct connection string. Follow these steps:
- Log in to your Supabase dashboard (https://supabase.com/dashboard/projects)
- Select your project
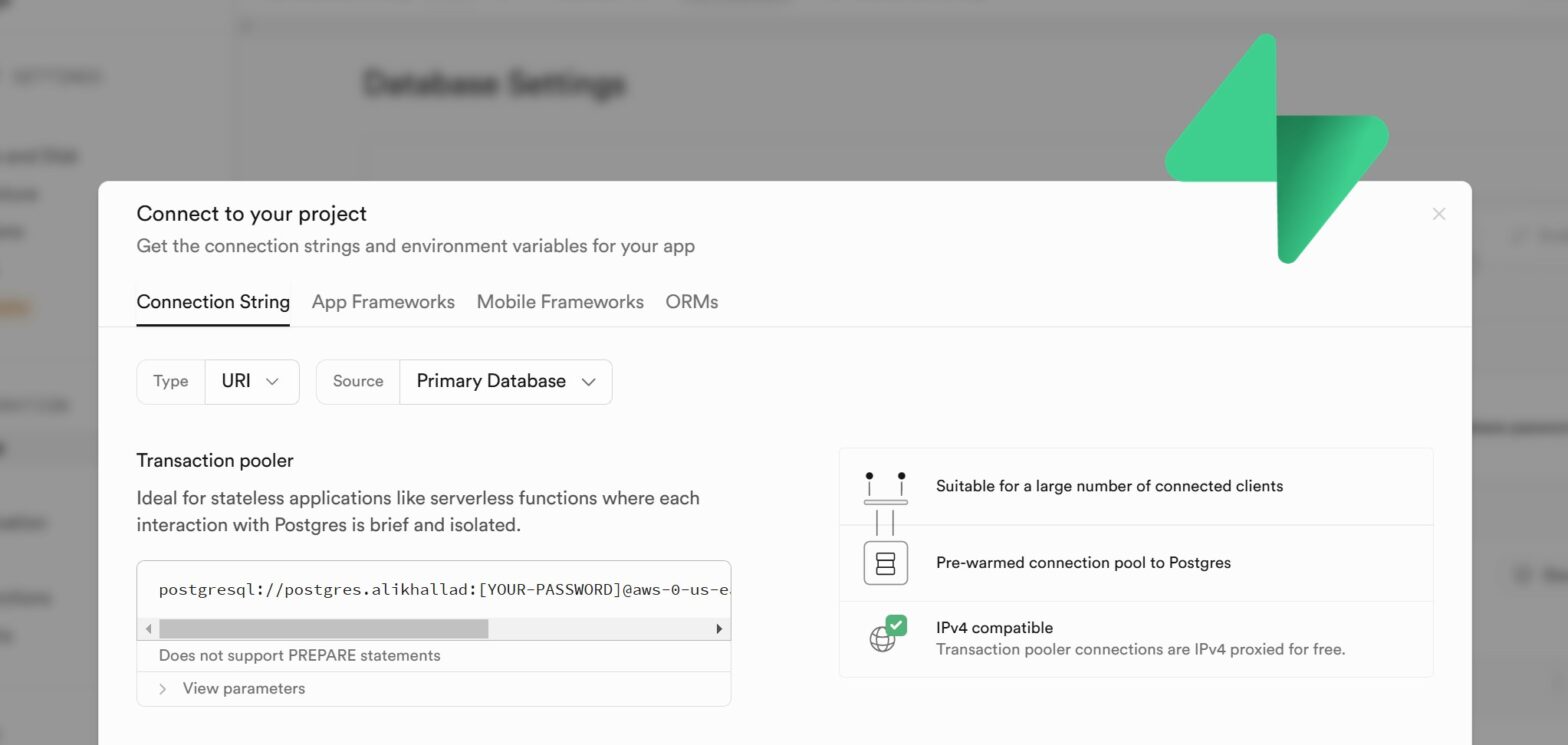
- Click ‘Connect’ in the top bar
- Scroll to “Transaction pooler” and copy the connection string (recommended for backup operations)
You’ll see a connection string in this format:
postgresql://postgres.xxxxxxxxxxxx:[YOUR-PASSWORD]@aws-0-us-east-1.pooler.supabase.com:6543/postgresNote: Replace [YOUR-PASSWORD] with your actual database password found in Project Settings → Database → Connection info → Database password.
Step 3: Creating the Backup
Now we’ll use pg_dump to create a backup. We’ll include a timestamp in the filename for better organization:
# Create a backup directory (optional but recommended)
mkdir -p ~/supabase_backups

# Navigate to the backup directory
cd ~/supabase_backups

# Create the backup
pg_dump "postgresql://postgres.xxxxxxxxxxxx:[YOUR-PASSWORD]@aws-0-us-east-1.pooler.supabase.com:6543/postgres" > backup_$(date +%Y%m%d_%H%M%S).sql
Optional: Creating a Compressed Backup
For larger databases, you might want to compress the backup file directly:
pg_dump "postgresql://postgres.xxxxxxxxxxxx:[YOUR-PASSWORD]@aws-0-us-east-1.pooler.supabase.com:6543/postgres" | gzip > backup_$(date +%Y%m%d_%H%M%S).sql.gzThat’s it! Make sure to store your backups in a safe place.
